Lucinda's e-Magazine

All pictures in this e-zine are original photograpic images taken by Lucinda M. Deitman unless otherwise noted.

My Photo
Name:
Location: Georgia, United States

Wednesday, November 22, 2006

Photographing-The-Young
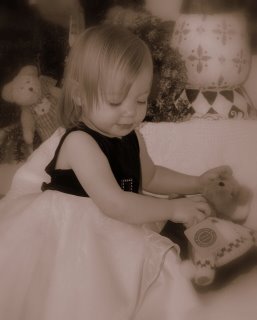
by: Low Jeremy

If there were one most exciting but stressful kinds of photo shoots there is—that would be child photography. Started out as a hobby of parents who are into photos and photography, the craft has evolved into something more commercialized and a viable source of income through the years.

But for parents who would want to capture the best moments of their children, professional photography lessons wouldn’t be that necessary, all they have to do is to learn about certain photography technicalities and observe the attitude and mood swings of their children.

Parents should bear in mind that when trying to photograph their children, they should be ready for occasional tantrums and crying. When this happens, let the child calm down by giving them something that would catch their attention like a toy.

Younger children like those tots under 5 years old are not very conscious or aware of the camera but this doesn’t mean that they are very interested in the ‘photo shoot’. To get their attention, make sure that you have something that will get their attention.

OTHER CHILD PHOTOGRAPHY STRATEGIES

Portraits—especially of children—never fail to evoke feelings to anyone. If you’re a budding professional child photographer, it would be better if you’ll have a brief background in child psychology and you better to create your own strategies by now.

Here are some strategies you can work on and try to reinvent over time:

Strategy no. 1: Prepare for the best and the worst.

Before the actual day of the shoot, make sure that you pay a visit to the house of the family to give you an idea what kind of child/ren you are going to deal with. It is also advisable to meet them personally and memorize their names to create familiarity.

You can also have a sort of ocular inspection around the area so you can picture the ideal background and set up mentally. Before leaving for the actual photo shoot, double check all the necessities and equipment you will need.

Strategy no. 2: Practice the power of smile.

Being friendly or possessing a friendly aura will draw children nearer to you. Smiling will also make them more comfortable dealing with you throughout the shoot.

Strategy no. 3: Impress them your “gears.”

Get children’s attention by impressing them with stuff they don’t know yet. Since they are generally inquisitive, you can get their attention by letting them touch and “play” with some of your simple photography equipment.

Strategy no. 4: Set the background.

Although a photo studio would give you all the comforts you need in doing your job, this wouldn’t ensure a good result for children photography. It would be best if you set a backdrop or location where children can roam around and express themselves freely.

Strategy no. 5: Back to basics with the natural approach.

Do not force a setting or set up where the child is not comfortable. It is best to photograph children in their best elements like riding their own bike or doing some art stuff. These natural settings would be more vivid in the coming years compared to those taken in a stiff and formal environment.

Strategy no. 6: Know the clothing basics.

Days before the shoot, tell the parents to show their kids what they will be wearing. This would ensure the comfort of the child during the shoot.

Strategy no. 7: Bring your best and the most appropriate photography equipment.

Make sure that you bring the best equipment to produce best results. Basics include digital or film SLR camera, variety of lenses, studio lights, flashgun, spare batteries, and compact flash or rolls of film.

Strategy no. 8: It’s all in the light.

Aside from having a good subject, make sure that you set up a good lighting because it will greatly affect the overall outcome of the photo.

Strategy no. 9: Be an “image capturer.”

Always be on guard to capture the best moments throughout the shoot. Always have your finger on the shutter button while your eyes are near the camera.

Strategy no. 10: Always focus on the “window of the soul.”

Needless to say, photographs where the eyes of subjects are tuned into camera produce the best photographs ever.

My Daughters Precious Ballet Shoes

by: Morgan Hamilton

I was really glad when my daughter told me during her fifth birthday, that she wants to be a ballerina when she grows up. It thrilled me to know that I had a true little girl who is not interested in being a tomboy. I enrolled her into some creative dance classes before going into ballet. I was overjoyed when her instructors told me after the first year, that they thought she would be perfect for beginner ballet lessons.

My daughter and I were so excited that we rushed out to buy the outfits that she would need for her ballet classes. My daughter looked so beautiful in her tights that I was literally I was taking pictures of her every few seconds. Then we began to look for ballet shoes. The salesperson was very helpful, but my daughter didn't like the way that the shoes felt on her feet. I tried to explain to her that ballet shoes were supposed to feel that way. I also told her that she has to wear them if she wanted to take ballet classes. My daughter pouted for a few moments and then finally agreed.

She attended her first ballet class after a week. My little girl was all decked out elegantly in her new outfit, but refused to put the ballet shoes on. I had to plead with her for about 15 minutes before I was able to convince her that she could wear sandals and put her shoes on when we arrived. She packed them in her bag, but then she told me that she would be dancing in her sandals. I just sighed and hoped that her teacher can do a better job of convincing her to wear the ballet shoes.

All of the other girls in her class were running around happily in their outfits when we arrived. My daughter removed her sandals but was content to walk around barefoot. I whispered the issue to her ballet teacher, who agreed to deal with it. She approached my daughter and whispered something in her ear. Before I knew it, the ballet shoes were on my daughter’s feet. I was amazed and pleased when I left the room.

My daughter is now in high school and has gone through several pairs of ballet shoes. She is still determined to chase her dream of being a ballerina in the future. I feel very proud and happy whenever I see her carrying those pink ballet shoes to class. Many of my paychecks have been spent on buying her ballet outfits and shoes. But I can tell you that I have never once complained about a single dollar I spent. I still even have that first pair of tiny shoes for ballet that we purchased. They are now sitting on my dresser, next to a picture of my daughter in her first ballet recital.

Friday, November 17, 2006

Black And White Photography In The Digital Age

by: Low Jeremy

The world is celebrating color in full spectrum, not just in the environment but also in the computer. In the 60's, people are happy to see their photographs in black and white copies and it extended for quite some time until technology can already reproduce and provide people with colored digital photography.

Why still use black and white? If you have watched the controversial movie "Schindler's List" (1993) by Steven Spielberg, it has been presented in the screens in black and white color. Critics were expressing dissatisfaction, and to some degree, one could think it is such a waste denying the audience of more than 1 million colors reduced to nothing but grayscale monochromatic theme.

Nowadays, black and white photography is directly proportional to vanity, because everyone desires colored output. In case of "Schindler's List," it was released on purpose as black and white, to give way to a dramatic impact for the setting of 1945 Nazi occupation. The effect of black and white reel, has added spice to the thematic goal of the director. The essence of using black and white is important for character shots.

The world is ironic and ridiculous at times, but we cannot simply take away black and white especially in the era of digital photography. We know all Graphic Arts editing applications, scanners, digital cameras, and other photography gadgets have grayscale options.

To start with your own black and white digital photography shots, you will not need extra effort and complications other than shooting as is. Take the shot in color then you can switch the setting of the digital image in an editor, using array of choices. If you are using Photoshop or Fireworks, you can change the whole image into black and white by editing "Hue and Saturation" or simply switching it to "grayscale" format.

Old photographs from developed films can be converted into digital images by scanning them. If you want a black and white portrait out of it, set your scanner into grayscale. The result is black and white photo.

Setting your digital camera into "evening shot" mode automatically converts the image as monochromatic. You can remove saturation to convert it to black and white. Digital camera works efficiently with a computer. You can do everything about it in full control---that is if you are adept with the manipulation of the technical side of it. It will be quite expensive but worth the effort.

Technology is getting better and better, if you choose conventional effects, as long as you have the 360-degree options to enhance possibilities, then black and white digital photography is very simple to produce.

Monday, November 13, 2006

Football FAQ: So You Won't Look Too Stupid Watching Football With Your Date

by: Hadyn Falk

* What are the positions in football?

There are two types of position, an offensive position and a defensive position. One of the most essential offensive positions is the quarterback. The protectors of the quarterback are the offensive line.

As an additional protection there are the running-the-ball positions of running back and fullback. These positions are located in the backfield, behind the quarterback. The last offensive position is the wide receiver. This position has the main objective of receiving (catching) the ball when the quarterback throws (passes) it.

The defensive positions are: defensive end, linebacker, cornerback, and safety, who has the last thing to say about defense. Safeties are located at the back, while the defensive ends are out front.

* What does each position in football do?

Offensive positions are: quarterback, offensive line, running back, fullback, and wide receiver. The quarterback is the leader of the team. He gets the ball at the beginning of each play and he makes the decision whether to throw the ball or run it.

The offensive line's job is to defend the quarterback or the running back, especially while they have the ball. Another thing the offensive line does is block or catch passes.

Running backs and fullbacks are the major hurrying unit. The wide receiver is the one who will usually catch the ball when the quarterback throws it. He must be tall and quick.

Defensive positions are: defensive end, linebacker, cornerback, and safety. The defensive ends are the outer part of the defensive team. Linebackers are the most important line-up of the defense. They are the quick, hard hitters. Cornerbacks are in charge of defending the wide receiver so he can catch the ball and run with it, while the safeties guard and defend the cornerbacks.

* Where did the name football originate?

A form of football called harpaston was first played by the ancient Greeks. In the United States it was played as early as 1609 in Virginia, though in a simpler form. For the ball, they used the inflated bladder of a slaughtered pig.

Most "football" today is played in Europe and South America, and is the sport that North Americans call soccer. Football got its name because in soccer the hands cannot be used to move the ball. Later, rugby came into popularity, wherein the hands are allowed to be used.

American football has been widely influenced by rugby, and is known throughout the world today as (guess what) "American football."

* Where did they get the shape of the football?

The shape of the football comes from the shape of the ball in the game of rugby. Football has an elongated ball with pointed ends. The ball is perfectly designed for the player to hold it easily and have a nice aerodynamic motion when it is perfectly thrown. It also has an unpredictable bounce when it hits the ground.

The ball is eleven inches long and about nine inches wide. All of the manufacturers put some laces on one side so the players can grip and hold it easily. This is the reason why rugby and football have almost the same shape of ball, in contrast to soccer, which has a round ball that is manipulated mainly by the feet.

Buying Christmas Gifts For Teacher

by: Low Jeremy

With Christmas fast approaching, one of the people that should be in your gift list is your teacher, especially your favorite teacher. Although it may be considered tacky to give gifts to your professors as some may see it as a form of bribery; you can still give gifts as long as they are not too expensive.

It is one way of showing teachers that you appreciate the efforts that they are making in teaching you what you need to learn. Below are some gift ideas for teachers that they will surely appreciate.

1. Cake and pastries

Who doesn’t want to be given cake and pastries? This is a wonderful holiday gift especially if you are going to have it designed in festive colors and figures. Of course, before you bake the cake or before you buy one, do some research and ask around for your teacher’s favorite flavor. Does she love chocolate cake or is more partial to mocha or mango? Does she like cakes or does she prefer cookies or tarts? It is often good to do some digging. It shows that you care enough to spend time in research.

2. Fruits

Apples have long been associated with gifts for teachers. Well, you can do better than that by giving them a basket of fruits that they can take to the faculty room or to their homes. Include fruits that are not so usual to lend it a more unique feel. Make sure that the fruits are fresh and ripe.

3. Turkey, Ham and other Holiday feast

Another great gift that you can give your teachers are turkey, ham or any food that they can serve in their dinner table come Holiday. You can either roast them yourself or buy one from the corner store.

4. Greeting Cards

Even as simple as a Christmas greeting card is enough to make your teacher smile. There are cheap cards available in bookstores that you can use. If you don’t have the money to spend for ready made Holiday cards, you can always make your own greetings cards.

In fact, they will better appreciate a handmade card because they know that it is something that you spent time and effort on. Besides, it is a great way to exercise your creativity and artistry plus of course some vocabulary!

5. Chocolates

Chocolates work their magic every time. One great time to buy lots of chocolates at really low prices is after Halloween when stores organize sale of leftover candies and chocolates from Halloween Trick or Treating.

Wednesday, November 08, 2006

What Are Architectural Landscape Photos?

by: Roy Barker

There aren't many but some of us take an interest in architectural landscape photos. With a view to giving some insight on this subject I have created this article to give a basic understanding and supply some facts about its origins. Some of us become interested in architectural landscape photos later in life, it doesn't matter when you take an interest but when you do you'll be hooked.

If taking architectural landscape photos is one of your hobbies, it might be interesting for you to read a brief history of architectural photography. Commercial portraiture was the main area of interest in the early years of photography. The ones who made architectural landscape photos were generally travelers, for different business reasons, not only especially for photography. At that time (the middle of the 19th century), photographers usually worked from a convenient window rather than at street level, as they do now.

WHF Talbot, one of the first photographers, used to take architectural landscape photos from his hotel window, in the cities he visited. Roger Fenton, the first war photographer was the first one to take fine architectural studies, using calotypes, both in Britain, his home country, and in Russia (in Kiev, Moscow and St. Petersburg). He learnt the waxed paper calotype process from Gustave Le Grey, its inventor, in his journeys to Paris.

Francis Frith was the first one to make the Middle East familiar to the civilized world, by the architectural landscape photos he took in his journeys. He beard with him very large cameras and used the collodion process, as he had to work in hot and dusty conditions.

Samuel Bourne is another British photographer that became famous for his work in India.

Most of the early architectural landscape photos give the subjects the impression of import and grandeur. The lenses needed for architecture were quite different from the ones used in portraiture. They had to give sharpness and linear drawing, but there was no need for high speed, as buildings sit still.

In the late 19th century, photographers were advised to keep the camera back vertical and to photograph buildings from the normal eye level, instead of using elevated viewpoints, in order to suggest the normal impression of height. The frontage and a side of the building had to be both included in the architectural landscape photo. Camera movements were also considered essential, and the most important movement was the rising front.

Frederick H. Evans is regarded as the finest architectural photographer of his era. He is famous for his images of the exteriors and interiors of English and French medieval cathedrals. He adopted the platinotype technique, which best suited his subject matter. His ideal regarding architectural landscape photos was the “perfect” photographic representation, unretouched and not modified at all.

The city growth at the end of the 19th century lead to the development of commercial architectural landscape photography. The most important companies that took advantage on this new opportunity, in New York, were the Byron Company and the company founded by Norman and Lionel Wurts.

In the beginning of the 20th century, the modern movement brought new standards, both in architecture and photography. Some of the new modernist photographers in 1920s were Berenice Abbott in New York, Ilse Bing in Frankfurt and Margaret Bourke-White, best known as a photojournalist. One of the best-regarded companies that made architectural landscape photos was Hedrich-Blessing. It was founded in Chicago in 1929 by Ken Hedrich and Henry Blessing. Today, Jim Hedrich, Ken’s son still runs the firm. The founder’s well-known quote “Don’t make photographs, think them.” suggests that their photos had something to say about the building, not only record an image of it.

Although he was an architect by profession, Ezra Stoller established himself as a leading architectural photographer. Some of his most important works are the architectural landscape photos of Le Corbusier’s Chapel Notre-Dame-du-Haut at Ronchamp. The key elements in Stoller’s work are light and space. Esto, the company founded by Stoller still makes some of the best work in the field.

Julius Shulman took a revolutionary approach upon modernism, turning the modernist principle upside down. He was the first one to introduce people in the frame of the camera. He did not want to show abstract images of wall details or empty rooms. In his architectural landscape photos, he “humanized” the houses designed by architects such as Richard Neutra, Pierre Koenig or Rudolf Schindler. Shulman is best known for his photograph “Case Study House #22, Los Angeles, 1960. Pierre Koenig, Architect”. The end of modernism also represented the end of Shulman’s career, as his ideas of composition, the sensitive images and his ways of working were deeply modernistic.

Some of the most important contemporary architectural photographs are Gerald Zugmann, Mark Citret and Richard Margolis. You can take a look at their architectural landscape photos on their web sites.

What's All The Fuss About City Landscape Photos

by: Roy Barker

This article attempts to open up some of the reasons city landscape photography is becoming popular and why it is that much different from normal photography. City landscape photography is indeed special but is it all that different after all? Let's go into this bit by bit and find out.

When we visit a city for the first time most of us are willing to spend a lot of money on books or postcards that contain city landscape photos. Often, just looking at city landscape photos might determine that you go and visit that city. It’s obvious that city landscape photography is captivating for most of us.

City landscape photography might be also regarded as the art of “selling” that specific place, that city, of sharing its beauty to people all around the world, of encouraging them to visit that place and (why not?) spend money there.

Making a city landscape photo is not very difficult. Of course, you need the proper equipment and you must have a clear idea of what you intend to suggest in your photo and what is it that you want to capture. You also have to choose the viewpoint; sometimes elevated viewpoints are a clear advantage in city landscape photography. You must also think about what kind of light is best in expressing your idea and how the weather should be. You might need a lot of time for taking a single excellent photo, especially if the weather is unstable, because it might be difficult to naturally obtain the best light or the proper shadows.

If you simply want to capture something that would be representative for the city, then you can just photograph the most famous places in the city, such as the London Bridge in London, the skyline in Manhattan or The Eiffel Tower in Paris. But the disadvantage in photographing these classical tourist sights is that it’s almost impossible to create an original work, as there are thousands of these city landscape photos already taken.

If you intend to attract tourists with your city landscape photos, you need to cosmeticize the image (imagine Broadway with papers thrown on the ground) and present it in the desired manner: postcard, poster, exposition, etc. City landscape photography becomes an art when its purpose is not selling anything, but just showing the beauty of those places. Black and white or sepia photos are sometimes much more interesting and suggestive than the colored ones.

When you photograph a city landscape, you basically try to catch the essence of the place you’re immortalizing. There are two ways to achieve this. You can photograph single buildings or large areas of buildings or you can photograph people in that city in their daily activities. The city has an important role in the development of the individuals living there, and the individuals influence different aspects of the city, in return. This is why it is interesting to capture the interaction between the city and the people living there.

City landscape photos might also have other purposes, such as a charity purpose. For instance, you can photograph homeless children in Bucharest (Romania) if you want to draw attention to the fact that they exist and should not be ignored, but indeed they should be helped to integrate into society. That’s a photographic contribution.

When you choose the places you want to photograph, you must think of the significance those places have for the city inhabitants. It is not difficult to observe that places with great importance for the ones who live in the city (from cultural, historical, social or economical points of view) are also significant for tourists. If all the Parisians walk on Champs Elise, then tourists will walk on Champs Elise. Therefore it’s likely, a beautiful city landscape photo of that boulevard will have the power to attract more tourists there.

Considering that “a picture’s worth a thousand words”, it is obvious that city landscape photos are one of the best ways to represent a city. Is it enough to look at a city landscape photo of New York that I will then want to go and visit that city, if that’s what the photographer wants me to feel? On the contrary, after seeing a carefully thought-out photo with street children in Bucharest, it is unlikely that I will have a desire to visit NY at that very point in time, but I might be impressed and saddened by that image of Bucharest and want to help them in some way. Having said that, this is not the same with all people but you will be amazed at the power a photographer can have with city landscape photo skills. Think carefully about the image before shooting away.

Monday, October 23, 2006

Prom: The Night You'll Never Forget And It Didn't Even Break Mom And Dad

by: Rose DesRochers

My daughter's grade 8 grad is coming up in June and I was eagerly thinking of ways to keep the cost down. Even grade 8 grad is a big time in a girls life. This is a night for my daughter to remember but it shouldn't cost me and my husband a fortune.

For many parents prom is an expensive time of year and families are struggling financially to give their son or daughter the perfect night that they will remember a life time. Well there is no reason why you can't give them that night but on a budget you can afford. I have put together ten tips to help you save a few dollars. Attending a prom doesn't have to cost a fortune. Prom night doesn't have to break us. Girls the memories of prom will not be if you spent 20 dollars to get your nails done or arrived in a limo. The memories will be of who you were in school and the special times that you all shared.

1. The Tuxedo: Boys why bother renting that tuxedo when you can purchase a nice suit that you can wear again for under the cost of renting that tuxedo.

2. Hair and makeup: Girls the cost of hair and makeup is expensive. The boys are lucky they don’t have to fork out this one. Hair, Makeup you’re looking at an additional 80 dollars. For makeup call your local department store and see about getting your make up done on Prom day, also call around to your local salons and see if they have a package deal that includes both hair and makeup. You can also save money by having your mother put up your hair. Look at some of the styles for prom online and make a fun night with mom practicing the styles before the prom. You could also get in touch with Mary K and plan a makeup party early in the afternoon on prom day and the Mary K host will do your makeup free.

3. Limos: They are nice but they are so traditional and cost a lot. Why not gather a group of your friends together and do something off the wall. Arrive at your prom on the city bus or contact your school and rent a school bus for the evening and have all your friends pitch in.

4. The dress: Girls purchasing a new dress will cost you 200 dollars and for what something you won’t wear again or will sit in your keep sake box. Why not shop on Ebay or your local used clothing store and get a dress for under the cost and then just pay the additional cost to have it dry cleaned. You may also want to check around with family and see if they have a bridesmaids dress or maybe your cousin still has her prom dress that you can borrow.

5. The flowers: Purchasing flowers from the flower store is going to cost you around 20 dollars. You can go to the craft store purchase the supplies to make your own corsages and boutonni for half the cost. They are so simple and fun to make. Make a fun day of it and invite your g/f over to make them with you.

6. The photos: Why hire a professional photographer when you can have dad take some nice photos with his digital camera and you can delete the ones that you don’t like. Then you can save even more money by emailing them to friends and family.

7. Parties: Save on the big prom party. Gather a bunch of your friends together and have a fun post prom party. Some ideas might be a pool party or a bowling party.

8. The Jewelry: Girls, girls why pay the expensive cost of Jewelry when Mom and Grandma might have their own personal jewelry store right in their bedroom. The sentiments of borrowing something from Grandma will be more special than anything new that you purchase from the store for this special day.

9. The dinner: Save money by having a backyard barbeque or a romantic dinner at home with candles and the works and order take out.

10. Nails and Shoes: If your city has a beauty school, you can make a nail appointment and have a student put nails on you for a discounted price . You can exchange shoes with friends or purchase a nice pear of white pumps that you can wear again and again.

I hope that these ten useful tips will help you save money and still have your unforgettable night.

Monday, October 16, 2006

Tread Lightly! What You Should Know About 4 Wheelers

by: Tavis J. Cooper

My husband and I live in a recreational area in central Minnesota. As with most recreation areas throughout the country this means many frequently use 4 wheelers around us. We have 4 wheelers ourselves that we use to plow snow from our driveway, haul wood from the wood pile to the house and to travel the recreation trails of the area. We also use our 4 wheelers during the deer hunting season to get back to our deer stands and to transport the deer out of the woods. I think they are a useful and fun vehicle; however there are so many people who use their 4 wheelers to destroy the natural beauty of our State unknowingly or purposefully.

It all starts from the fortunate fact that there are several paths in the acreage behind our home for 4 wheelers. We normally use these paths to go from one neighbor’s home to another and to simply walk in the beautiful woods. The wooded area where the paths are located has quite dense vegetation filled with very old beautiful hardwood maples and ash trees. This wooded area is classified under tax forfeited land, so it is collectively owned by the State of Minnesota. There is an agreement among the neighbors that we will all do our best to keep the paths clear of brush and fallen debris. However, there are no rules or guidelines whatsoever about the use of 4 wheelers on the paths. Everyone used common sense and was courteous to each other as well as to Mother Nature.

Everything seemed to be going well, until one particular day. Recently our path system was discovered by a group of 4 wheelers that are now using it as a connection from one racing area to another. The racing causes an excessive amount of noise and some serious damage to the wooded area, which prompted the interference of the department of natural resources which stepped in and banned the use of ATV’s in this wooded area.

This has been a great disappointment to those of us who were using our 4 wheelers responsibly. When I mentioned this to some of my co-workers I was surprised to find out a majority of them thought that all ATV trails should be closed. Many people see these trails as dangerous and harmful to the environment. I was amazed that they saw the 4 wheelers as a bad thing per se. A close look at the situation should reveal that the real culprits are those irresponsible people driving them.

The woods behind our house are much quieter now. People still use the paths for walking and nature-gazing. The thing that still bugs me is that others are getting the message that 4 wheelers are bad for nature, when the true message should be irresponsible people are really what are bad for nature. It is unfair that thoughtless behavior by some people is over – generalized and affects the entire community. I love Nature. I love my 4 wheelers, too. They can co-exist.

Thursday, October 05, 2006

How To Take Pictures Of Fireworks

by: Gary Bunn

These days there seems to be a firework display at almost every outdoor event, and there are also plenty of other opportunities which you can use to perfect your Firework technique. The unpredictable nature of the position, color and shape of each firework explosion means that no two shots will ever look the same. But follow our advice and you'll be able to get some stunning fireworks shots.

Capturing the spectacle of a firework display is all about predicting when and where the most dramatic events are going to take place. Try to find out where the main display at your event will be taking place, and where the fireworks will be fired from. To capture the wider view of large public displays it's often best to avoid the most popular spots close to the action. At popular events you'll struggle to find enough room to set up your tripod - a necessity to shoot the display - and you'll also often be too close to the action. It's much better to find a spot that gives you a viewpoint over the whole display, to allow you to capture as many of the individual fireworks as possible. It's worth going back to the busier areas if you want to try some portraits of family and friends around the fire though.

When searching for a place to shoot the display, look out for things to use to enhance your images. Flood-lit buildings are great for giving a sense of place, while water can create amazing reflections to add an extra element to your pictures.

Unless you've been to the same display before, trying to predict where many of the fireworks are going to explode can be tricky. Some rockets can go hundreds of feet in the air before they create their light show. The wide-angle end of a standard zoom will give a broad enough view for most displays, but if you have one it's worth taking a wider lens just in case the rockets go much higher. While the results can be pretty hit or miss, the unpredictability can lead to some great results. Don't expect every shot to be a winner and make sure you shoot plenty!

If there's a fire (or floodlights) near to the fireworks display you can include the light from this to give your shots an extra glow, rather than simply recording the fireworks against a black sky. As the subject is much brighter than the surroundings the exposure times are a little more hit or miss than for just the fireworks themselves, so experiment with shutter speeds and aperture settings.

How to set up your shots

The intermittent and unpredictable nature of fireworks means that the automatic exposure systems will rarely give you good results. Instead you'll need to set the camera to manual exposure mode and set the shutter speed and aperture yourself. As it will be dark then bright as the fireworks explode, it's also very difficult to use the metering to gauge the exposure needed. Although you're working 'in the dark' when it comes to exposure it's not as difficult as it first appears, as there are some handy tricks that will help you to get the results spot-on.

Using a Tripods

You'll need a longer shutter speed to capture several bursts than if there are loads of fireworks going off in quick succession. For most displays a shutter speed of between 8 seconds and 30 seconds will give you plenty of action. Your shutter speeds will run into several seconds, so you'll need to put the camera on a tripod and release the shutter using the self-timer, or ideally a remote release to combat camera shake.

Select manual exposure

The light will vary from almost pitch-black to bright during your exposures, so you need to select the manual exposure option and ignore any reading from the metering. With very little light you'll find that the auto-focus will struggle, so set the camera to manual focus. As you'll be some distance from the subject set the focus on the lens to infinity. The shutter speed is more about the number of bursts that you capture than the exposure of the result. When it comes to ISO, set the camera to the lowest ISO possible lo minimize noise. You can try fast settings such as ISO 800 or 1600 to allow you to shoot portraits using the glow of the bonfire, but expect plenty of noise or grain.

Aperture & shutter speeds

With the camera set to ISO 100 you should try exposures at apertures of f/8 and f/16. As a guide, if you're close to the fireworks use f/16 and if you're shooting from a distance use mainly f/8. If you're using ISO 200 then set f/22 for close subjects and f/16 for distant displays. The shutter speeds are less critical than the aperture for the brightness of your image, but they do affect how many bursts and how much of the display you will record in a single frame.