Lucinda's e-Magazine

All pictures in this e-zine are original photograpic images taken by Lucinda M. Deitman unless otherwise noted.

My Photo
Name:
Location: Georgia, United States

Friday, April 28, 2006

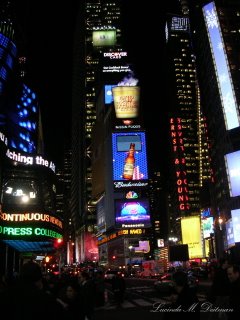
Night Photography: Low Light Tips and Techniques
By: Richard Schneider

Photography at night can be used to create mysterious and amazing photos. When I say photography at night I mean the hours from around sunset until when the stars are clearly visible. The long exposures associated with low light can create unique effects and unusually sharp photos.

And when I say long exposures I mean exposures lasting from half a second up to even 30 seconds. An exposure that long would seem impossible to prevent shaking, so my technique that I use very often is to compose the photo like I would normally and then to set the self-timer so the camera takes the picture on its own and I don’t even have to touch it.

Equipment Options

For low light photos, a tripod (or some kind of substitute) is very necessary. I almost always keep a tripod in the trunk of my car or carry a miniature tripod around on trips. A miniature tripod can be very handy because it is typically small enough to fit in a pants pocket so it can be taken anywhere. Some photographers carry around a bean bag or something like it so that can set their camera down and tilt it in any way they like. Some of my best pictures I have taken simply by setting my camera down on a newspaper stand and setting the self-timer.

Many photographers are convinced that they need a cable release to take long exposures but the self-timer release option on just about all cameras works just as well. All you have to do is set the camera up, configure the self-timer, press the shutter button, and wait the specified amount of time (usually 10 seconds) and the camera will take the photo automatically. And you don’t have to touch the camera so the photo won’t be blurred from hand shaking.

Night Photo Opportunities

Landscape Photos - My favorite kind of night photo usually includes a landscape with some kind of foreground element, some sort of framing element, and lots of lights throughout the scene. Adding some kind of foreground item to the frame helps to create a greater depth of field, this technique works for any kind of photo but I have found that it makes night landscape photos much better. Another tip you should keep in mind is that the main subject of a night photo should probably be the most well lit. Lots of light is good for a night exposure but there should still be some focus applied to the major objects in a scene.

Capturing Motion – A very popular kind of night photography includes a steady camera with some sort of fast moving object streaming through the frame. When cars are photographed at night with a long shutter speed, the headlights make a bright pathway of light and in most cases the car can’t even be seen. Another option would be to set up your camera next to a lighted area with lots of people moving like a night club or an illuminated street. Just about any kind of motion captured with the camera steady produces a very interesting photo.

Balancing Aperture and Shutter Speed

When taking photos at night you should keep aperture in mind as well as shutter speed. It is without question that you will need a long shutter speed, but the aperture that you choose will provide the depth of field. When I take night photos I usually have a very long shutter speed (5-15 seconds) and a very narrow aperture (high f-stop). This combination creates a huge depth of field and makes everything very crisp and in focus. Of course sometimes you will not desire a great depth of field and in those situations you should widen the aperture (small f-stop).

Calculating the Exposure

Figuring out what exact shutter speed and aperture you should use can be very challenging in Manual Mode. I would recommend that you just try many different combinations for each scene and eventually you will refine the settings that you prefer. Another technique I use is Bracketing, if you bracket all your photos so the camera takes multiple exposures at different settings, you are more likely to end up with a photo that has a satisfactory brightness.

Conclusion

There is no exact science to night photography; I hope some of these tips will guide you in the right direction. But the best night photographers are usually the people who experiment a lot when they are taking low light exposures and eventually they figure out the best scenes and best exposure settings to match. Just remember that you need a very long shutter speed setting, and that you need to keep the camera very steady.

Thursday, April 20, 2006

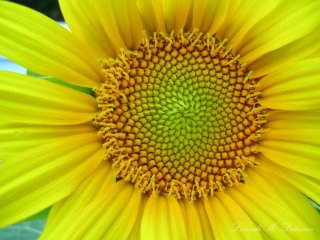
10 Tips for Great Flower Photography

By: Ken Henderson


Flower photography is not only a great way to spend your time learning different photography techniquesit is also a great way to add to your home decor! Flowers are a fantastic subject, not just because of theirbeauty, but also because of their availability. If you don't have any flowers in your own yard to photographyou don't have to go far to find some. You can easily photograph flowers at your local park, the Mall, arestaurant, a friends garden, a community garden, just about every where you go there are flowers.

If you don't want to photograph flowers in their natural setting you can purchase flowers in most grocerystores or at a local flower shop to take home and photograph in a studio setting. In fact, it's hard to find alegitimate reason for not photographing flowers.

Let's get down to business. Here is a list of 10 tips that will help you create some amazing flowerphotography.

1. One of the first things you need to do with digital photography is to make sure you are using thecorrect white balance settings. If your camera has the option, I recommend that you use themanual white balance function. If not, then use whatever setting is appropriate for the lighting youare shooting with. The equivalent to white balance if you are shooting film is color balance. If youare shooting outside be sure you are using daylight balanced film. I also suggest that withdaylight balanced film outdoors that you use a slight warming filter. Most of the flowerphotography that you may do will either be in shade or on an overcast day creating a much bluerlight then the film is balanced for. On the flip side, if shooting indoors with incandescent lightingor normal house lights you should be using tungsten balanced film. If the indoor lighting is beingsupplied by florescent light, then use a florescent filter with daylight balanced film. This is just astarting point. Experiment, mix it up. You can get some fantastic special effects that way.

2. Get a polarizer filter. The great thing about a polarizer is that it will eliminate or reduce imagedegrading reflections. This helps to improve color saturation and contrast. At the proper angle itwill also dramatically darken a blue sky. This effect is adjusted by rotating the filter until thedesired effect is achieved. There are 2 types of polarizer's available, circular and linear. Most ofthe advanced metering systems today that are built into your camera will not function properlywith a linear polarizer. So I suggest you get a circular polarizer to play it safe. I have also seenwarming polarizer's. While I have not tried one you may want to experiment with them.

3. Always use a tripod. Let me repeat that, "Always use a tripod". Not only will a tripod steady yourcamera and help you achieve a much sharper image, but it will also force you to think about yourcomposition. You will have to place the flowers in your photographic image much moredeliberately instead of just pointing your camera and shooting away.

4. Don't just take a snapshot of a flower that interests you and then move on. Set up your first shotto include the whole flower then concentrate on the details of the flower that attract your eye.Focus on the color or small details of the flower.

5. Control your depth of field. If you are photographing a single flower with a busy background thenuse a wide aperture to selectively focus on the flower and blur out the background. Conversely, ifyou are photographing a field of flowers the use a smaller aperture setting to bring most, if not allthe flowers into focus. If your camera has a depth of field preview then this is the time to use it.

6. Look for the unusual. Some examples would be snow or ice on a flower, A flower growing out ofconcrete or even a dead flower that has an interesting look.

7. Don't put your camera away just because it's cloudy or looks like a storm is coming. Colors reallypop at this time and you can get some amazing photographs in these conditions. I have evenphotographed in rainy and foggy weather with great results. Be sure to use a tripod and keepyour gear dry.

8. On a bluebird sunny day, soften the harsh contrasty light by placing a diffusion screen betweenthe flower you are photographing and the sun. You can purchase a portable diffusion screen oruse something you have on hand. You can completely block the sun and put your flower inshade, then redirect some light back on the flower with a reflector. This reflector can be acommercially made reflector or just something reflective like a white T-shirt or a piece of foamcore. Another photographic technique would be to use fill flash. If your camera has an automaticfill flash function then give it a try. Experiment with the lighting ratio if your camera will let youchange the flash output. I find reflectors to be a better option then fill flash most of the time.

9. Photograph your flowers from different angles. Shoot straight down, from the side, from theunderneath, just change it up a little.

10. Have fun with it. Don't be afraid to experiment and try different things. Once you think you havethe photograph in the bag, get wacky with it!

Friday, April 07, 2006

Tips for Growing Beautiful Roses

by: Marilyn Pokorney

Growing roses isn't difficult. It just takes some tender loving care.

Plant roses in a location which gets full sunlight.

Roses should be pruned in the spring. Cut out dead and damaged branches. Always sharpen the hand shears and soak them in a solution of half water and half bleach before pruning. This will helps to protect the rosebush from diseases and insects.

Mulch the rosebush with wood chips, pine needles, grass clippings or other organic mulch. The mulch keeps in moisture, keeps weeds from growing, and helps to prevent diseases.

Protect roses during the winter months by adding a few extra inches of soil to the base of your roses.

Fertilize roses regularly. Kelp is an excellent natural fertilizer. Stop fertilizing one month before expected frost date.

Water roses deeply once a week at the roots and prevent getting the leaves wet. Wet foliage invites fungal diseases. Alternatives place a drip or soaker hose around the rosebush and cover with mulch. Water in the morning for best results.

Roses need to be planted in soil that provides good drainage. If not possible then plant roses in raised beds. Allow at least one foot of space between the rosebushes for good air circulation. This too helps to prevent disease.

For insect pests a good natural insecticide is Neem Seed Oil. It is also good at helping to defeat fungi. In severe cases use an insecticidal soap or chemical pesticide.

Aphids are the most common rose pest. Simply wash the rosebush with a blast of soapy water from a hose. This will knock the aphids off.

Japanese beetles are the second most common enemy. At the first sign of them apply insecticides and continue on a regular basis. Garlic plants and sprays are organic techniques to help keep the beetles away.